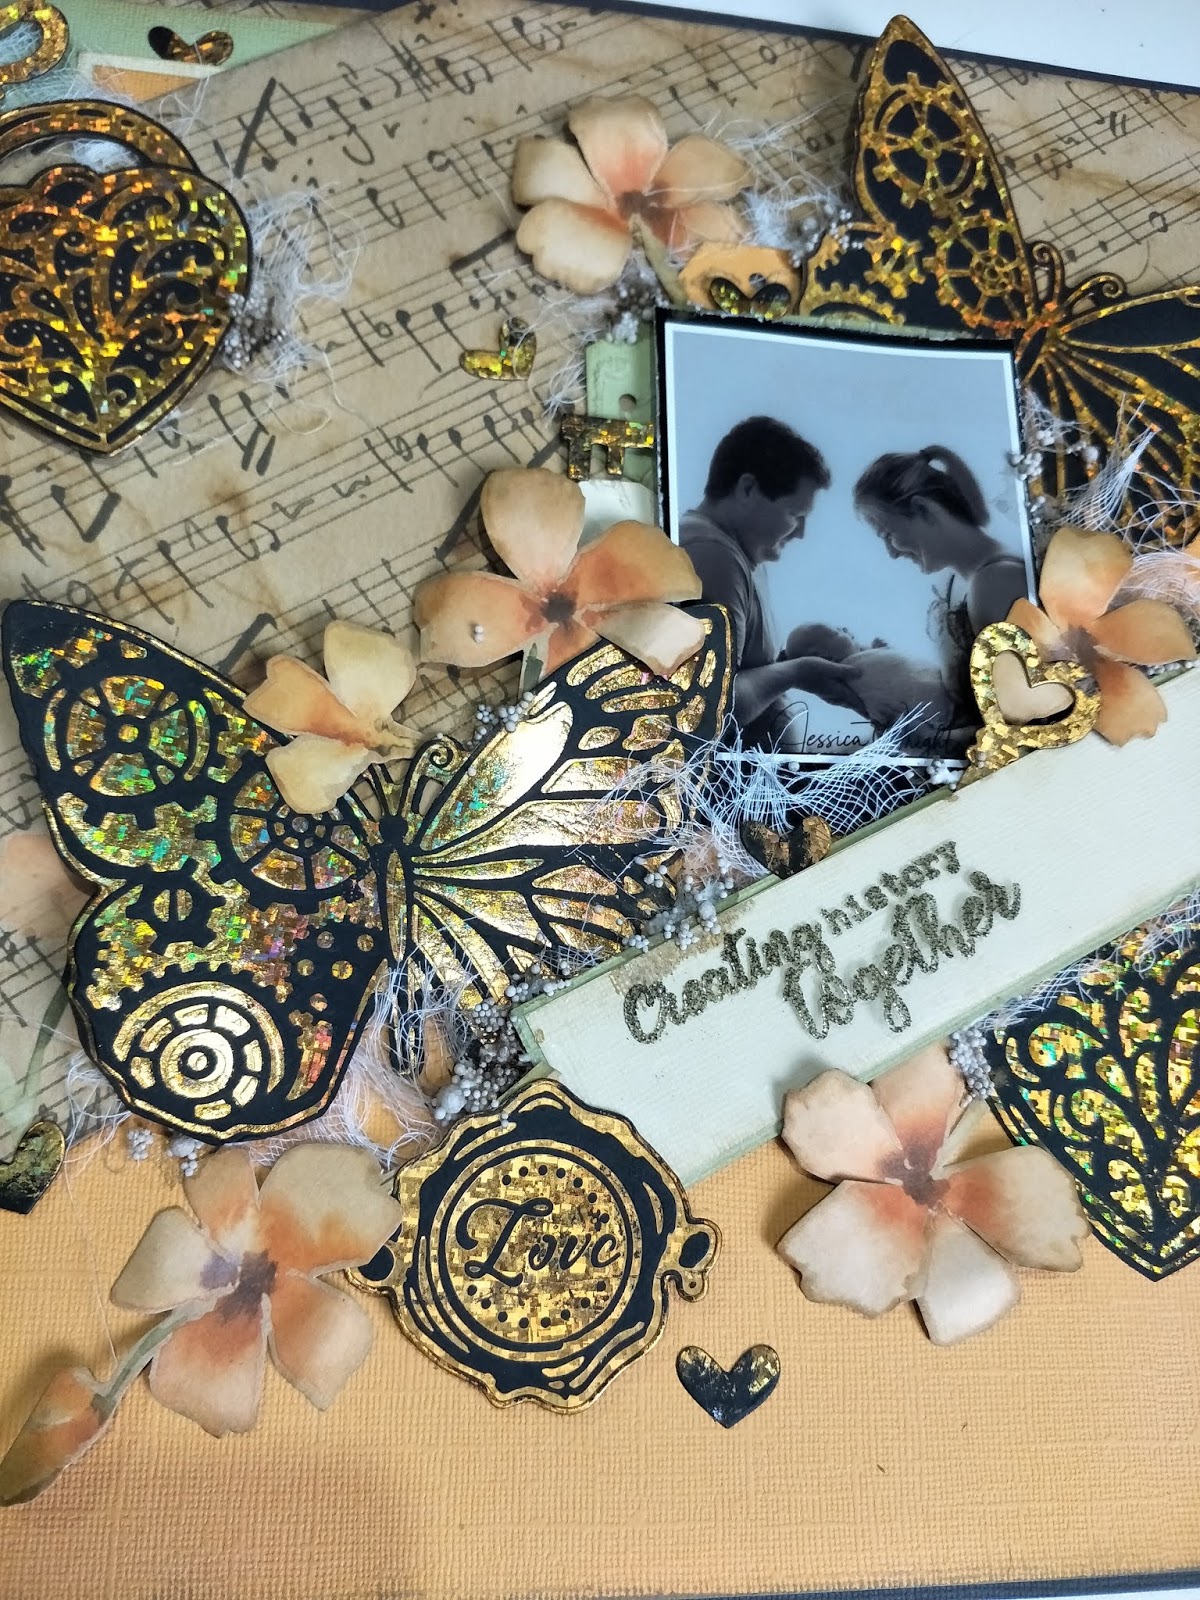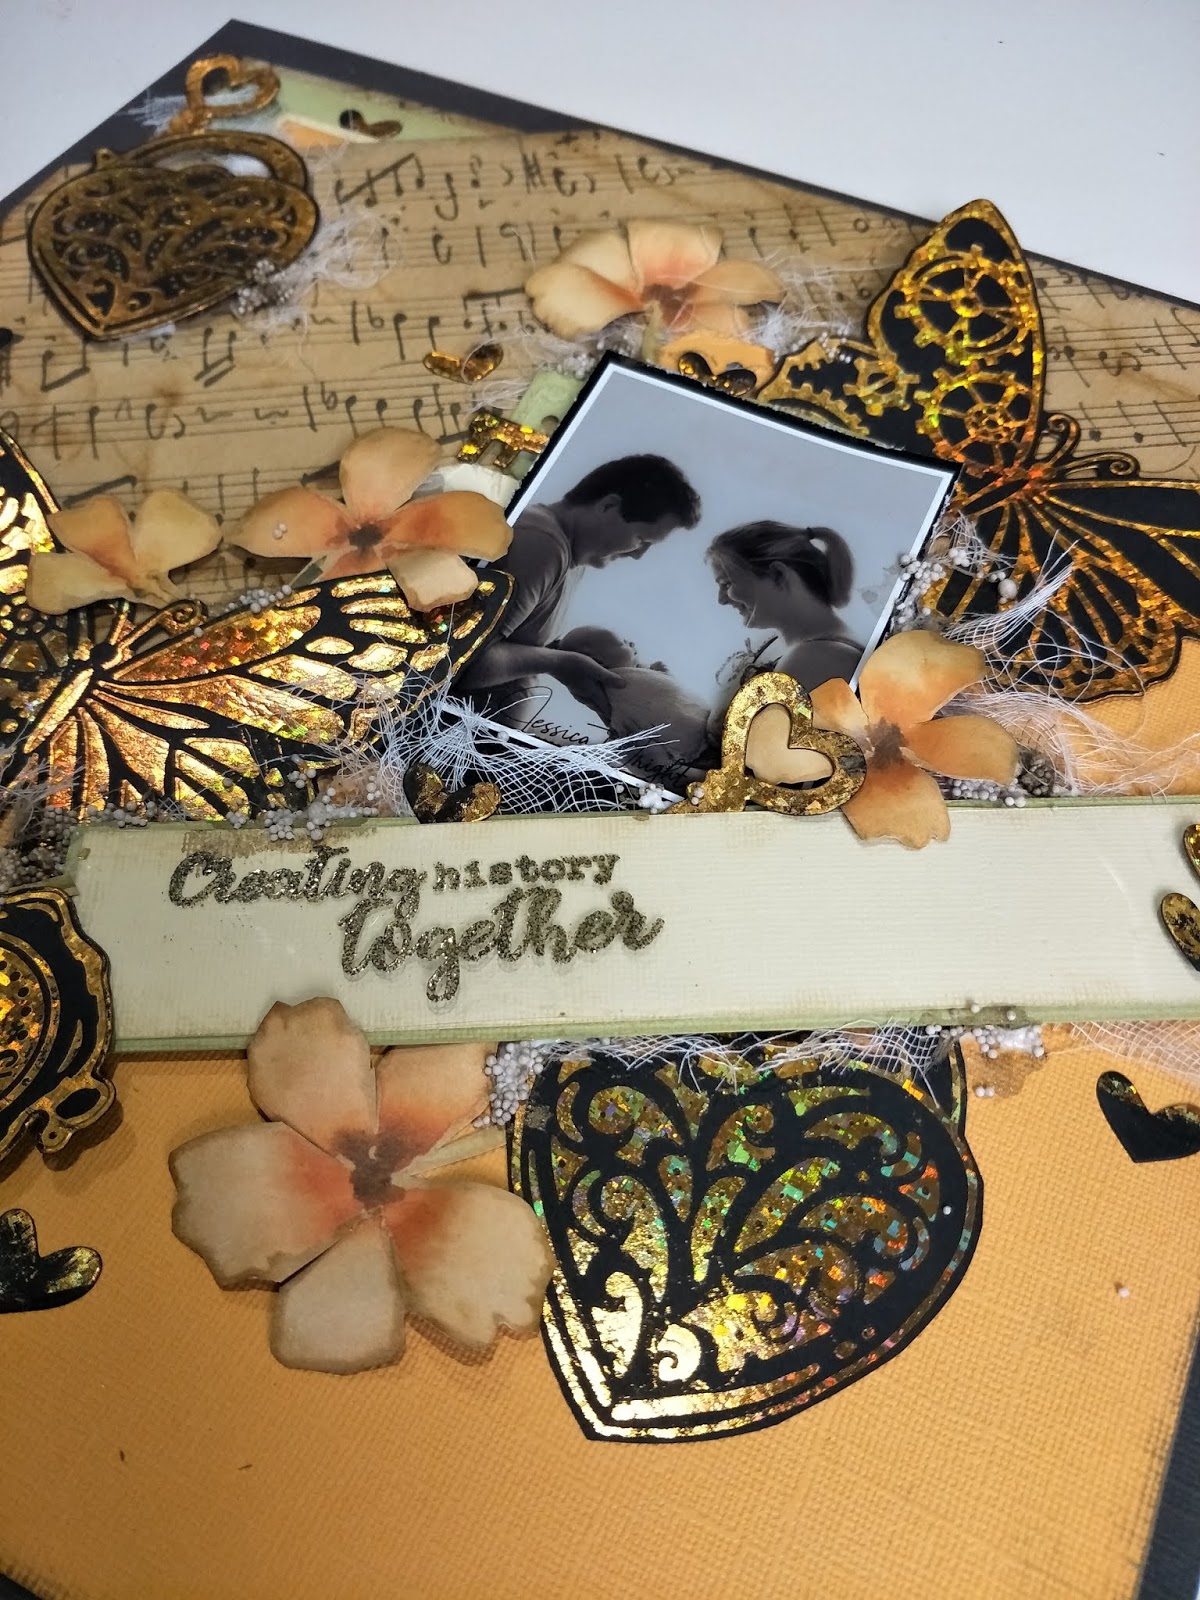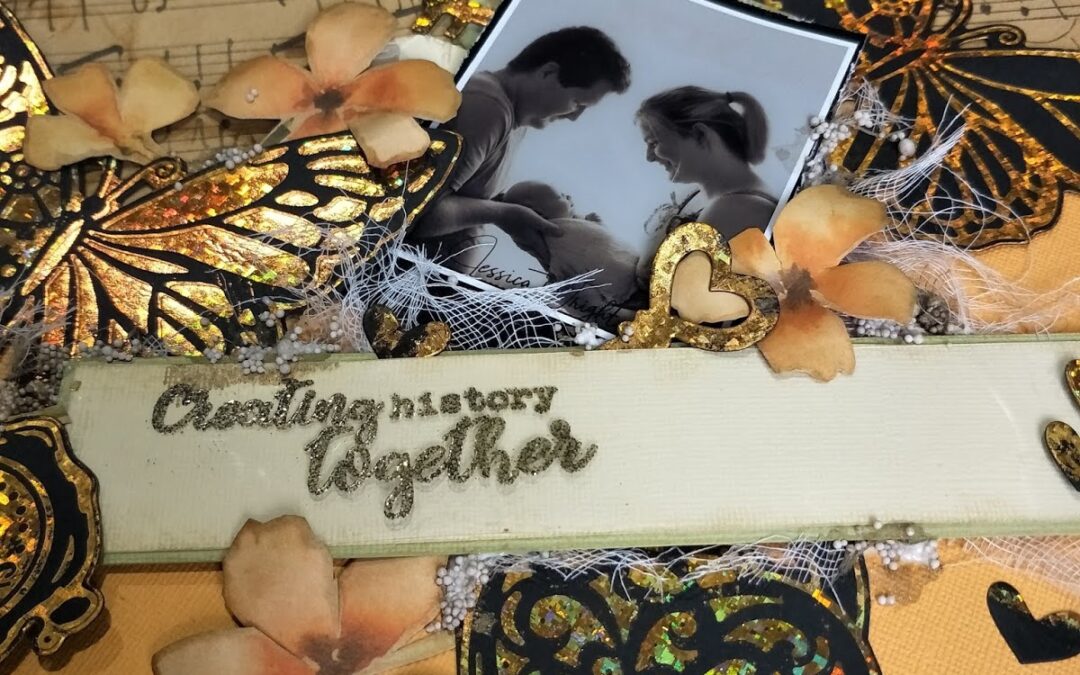
I love the negative images just as much as the positive ones from foiling, so I added both images of the butterfly and locket to this project. The sentiment stamps are just as impressive. How appropriate is this one -‘Creating History Together’ for new parents. I hope it inspires you to give it a go!
I cut the designer paper just under the music notes, being careful to keep any overlapping flowers by fussy-cutting around them. I followed that angle to cut all other papers. I tried to create a bit of interest in the top left corner to try and balance the colours. I wanted to add interest to the borders so I off-set them with different width margins. All the edges of the paper cuts were inked.
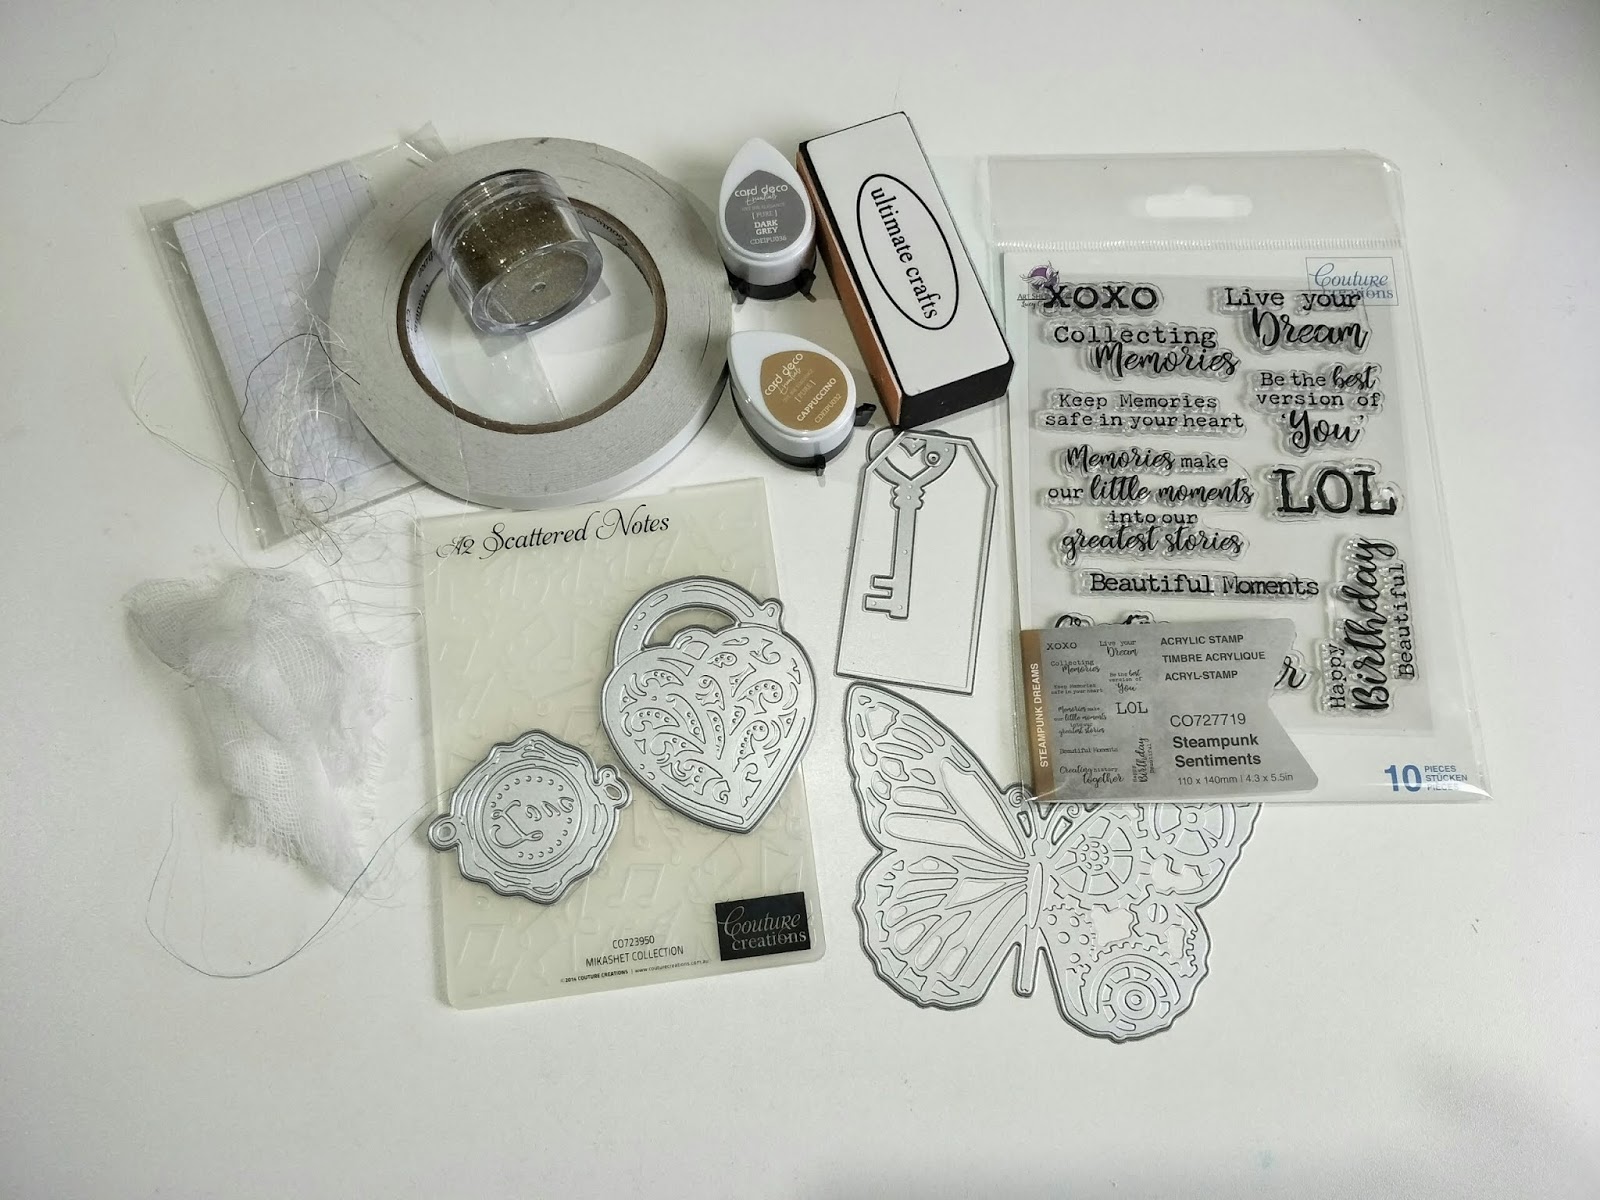
All the foiling was done on black card. I used both the positive and negative images of the butterfly and locket. I die-cut the key and small heart (that was from the centre of the key), added glue to them, then used the off-cuts of the foil to burnish over the glued area then lifted off leaving a distressed look on them.
I die-cut the small tags, placed them into the embossing folder and then ran them through the die-cutting machine. I brushed the sanding block across the surface of the tags until the core paper appeared on the music notes.
I fussy-cut a few flowers from the designer paper, inked the edges and curled the petals to give them more dimension.
Depending on the various pieces, I used cardboard, foam tape and glue to mount them.
Once all the bulk pieces where in place I tucked and glued the muslin into areas that looked a bit bare. I added some drops of brown alcohol ink to the art stones then glued them down. I rubbed/blended a bit of white gesso around some of the elements just to soften their edges.