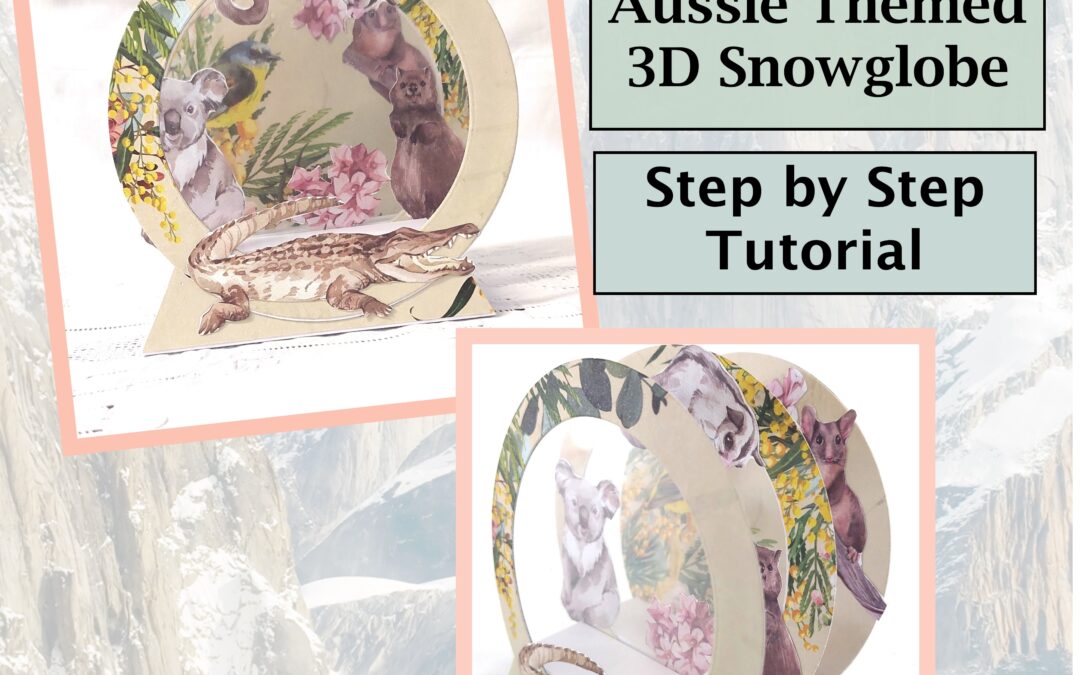

Mary here again with another construction card created with the Australia The Lucky Country collection. Something a little different but interesting and fun to create.
Cutting
White cardstock:
1 x 4”x 10”
1 x 4 ½” circle [Back of snow globe]
Making the circle frames. [you will need – 2]
Using the 4 ½” and 3 5/8” circles join together using the low tack tape.[Make sure that the distance between the 2 dies is the same all the way around.]
HINT: Make an extra one of these circle frames to use as a template in case your tape gives way.
Patterned paper:
2 x 4”x 1” for the front and back base of the snow globe
2 x 3” x 1” [for top of pillars]
2 x 4 ½” circle making sure to keep the bird for the front, and a plainer piece for the back. [back of snow globe]
2 x circle frames the same size as the ones cut from the white cardstock.
Acetate:
2 x 4”circles from the acetate sheet
Scoring
On the long side of your paper score at 1”, 2”, 3”, 4”, 6”, 7”, 8”and 9”. Turn paper to short side and score at a ½” and 3 ½” as far as the 3rd. score line. Do this for both ends. Cut down the ½” score line to the 3rd score line then angle out to the outside edge of the 4th score line. Burnish all score lines.
Assembly
- Before making the base attach the 2 x 4”x 1” patterned paper to the cardstock base on the angled sections. Trim off excess.
- Glue the first and last 1”pieces to the inside of the base so that they form 2 square pillars. As per picture.
- Do not glue these 2 pillars together yet.
- Attach the 2 x 4 ½” patterned pieces of paper to the corresponding piece of white cardstock.
- Glue the 2 acetate circles to the back of the circle frames created with the white cardstock.
- Now glue the patterned paper circle frames over the top of the acetate.
- Be careful with the glue, as if it gets onto your acetate it will smudge it.
- Take the back circle and glue it to the back of your base. Position it in the centre of the back and 1/8” up from the bottom.
- Take the second made circle frame and glue between the 2 pillars. Once again 1/8”from the bottom.
- Glue the last circle frame to the front using the same process.
- Now decorate with your choice of ephemera pieces.
Tip: Start with the back circle and build your way forward, making sure that nothing in the front section obscures the back section.


Couture Creations Material List
- CO728699 White cardstock [280gsm]
- CO724603 acetate sheet
- CO729080 Australia The Lucky Country Ephemera pack
- CO729079 Australia the Lucky Country paper no.8
- CO721985 6mm double sided tape
- CO728511 All Purpose Art Glue
- CO729052 Go Letter Press low tack tape
- CO726342 Scoreboard
other: Circle dies…..4½”, 4” and 3 5/8”

FIND OUT MORE ABOUT THIS PROJECT & JOIN US ONLINE
LOOKING FOR A PRODUCT?
Follow this link to find a retailer:
https://couturecreations.com.au/pages/store-locator
HAVE A QUESTION?
Email us here: [email protected]
WANT TO CHECK OUT WHAT'S NEW?
Follow this link to see the newest products coming to a stockist near you...
https://couturecreations.com.au/collections/newest-products
And follow us online to interact with other craft enthusiasts
and be inspired with regular content >>>
YOUTUBE | FACEBOOK | INSTAGRAM