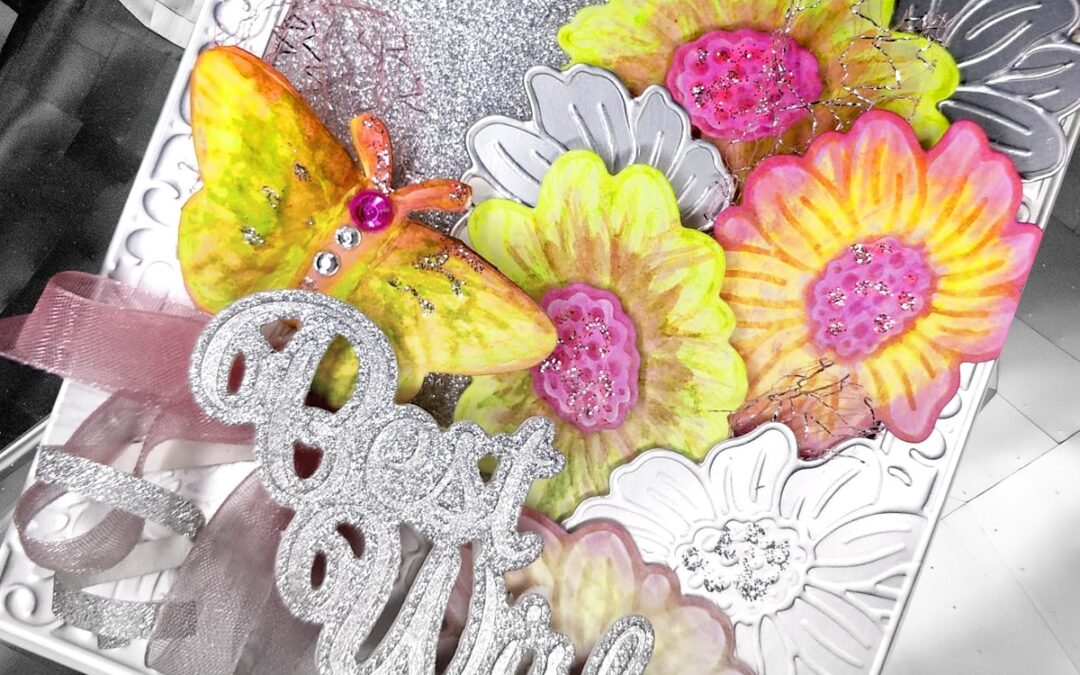


Card 1 – Standing Daisies
I started by die cutting the daisies using the ‘Go Cut & Emboss’ platform and new ‘Water Colour’ Paper for this – worked a treat. The elements cut sharply and embossed beautifully.
I left the die-cuts in the paper strip while I painted them with 3 fluro alcohol inks – Green, Yellow & Pink.
I put drops of the colours onto the glass mat and used a blending tip to brush paint the flowers. The inks dried fast which was good because I could keep adding layers of colour until I was happy with the result.


Next I added foam squares under all the die-cut pieces, tied a bow and added a couple of adhesive gems along the centre of the butterfly. I gently curled the wings of the butterfly to give a more dimentional look.
I glued the silver glitter card (backed with cardboard) to the card base. The Floral frame die was cut from matte silver card, this layered on top of the glitter card. This was my base that I used – the embossing was just beautiful.

Card 2 – Layered Camelia
I wanted to try dropping/spraying alcohol inks onto the watercolour paper to see what would happen. I have a short video clip below showing what I was up to doing this.
Once it was dry (not long) I just cut the dies from the paper. The Fluro and Glitter Accents colours are so vivid!


Card 3 – Zinnia Flowers
I was curious how the fluro inks would look like on black card, so I had a play. The colours remained true even on black!


Materials List