Hello Fiona here, back again, and I hope you all enjoyed creating your journal covers, now it’s time to start putting in our signature in other words the pages and creating a closure for the journal. Also creating some pockets inserts for journal.
Things you will need
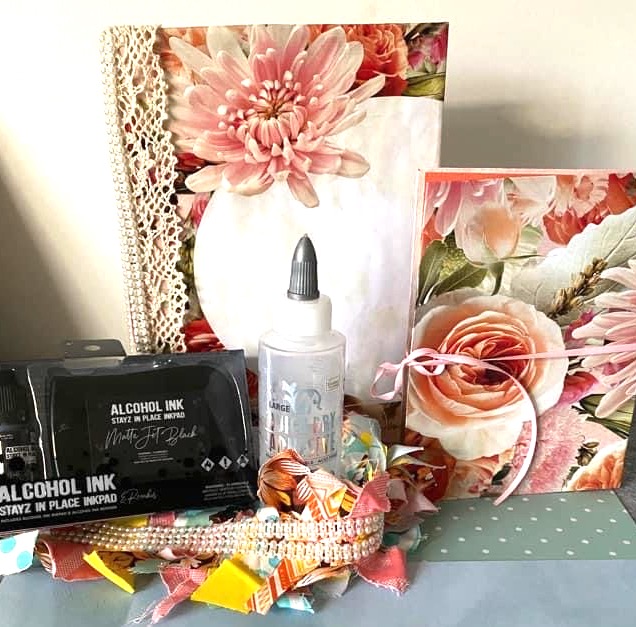
Waxed thread is what I used but you could use string crochet cotton or whatever you have in your stash if you have some candles, you could even use that to wax your desired thread. A needle that your desired thread will fit trough, I used a bag needle or a darning needle.
Some embellishments of your choice. If you are also wanting to create the band closure that I created, you will need some material scraps that are in the colours that will co-ordinate with the Journa. I really did just use scraps that I had at home you will also need some sort of light weight material to attach the scraps to and a piece of elastic approximately 10 cm long, some bulldog clips, you can see in the video what I’m talking about. If you are going to sew the closure you’ll need a sewing machine or you could also glue it together. If you don’t have a sewing machine, you can glue your closure. I would use Quick Dry Adhesive as it is a strong hold works well on material metal and plastic other papers for your signature.
Ok let’s get started – You can also view video here: https://youtu.be/kSCtkNDimPk
You will need a piece of material that is approx 2 cm wide and whatever your desired length is.
Either using a sewing machine or glue start to attach your scrap of material across your 2cm piece of material, once you have it to the desired thickness you can then attach whatever other embellishment’s you would like. I used 2 rows of the DL pearls that I used on the journal cover, put that aside to dry while we work on the signatures.
You will need 3 paper sheets of the Elegance collection kit CO728820 of your choice and you will need to cut them down to fit into your journal mine were 30cm x 22.5 cm. This size will allowed me to pick papers that were A4 that fit directly into the journal folded in half, fold each paper in half and really crease the fold with a bone folder once you have the desired amount of pages in the signature, you will make 3 of these.
Now we need to make the holes to be able to put the signature in, you will need a piece of paper that is the length of your spine on your journal and as wide as your spine mark which is the top fold the paper in half lengthwise then fold each side to the centre fold line this will create 3 crease marks on your paper. Now we are going to do the same thing from the short side of our paper fold in half then fold each end in half towards the middle (video will show this process if I haven’t made it clear).
Once this is done you will put a make on each intersecting line 9 in total.
Place this on your spine and use some low tac tape of some sort to hold it in place using your Couture creations Prik tool CO727159 poke some holes in the spine of your journal cover you may need to wiggle it about a bit to make sure the hole is big enough for your needle and thread to go through.
Get your first signature and open it to the middle lay the hole template alongside the centre fold of your signature with a pencil mark off the 3-hole mark make sure your signature is facing the right way with the prik tool CO727159. Line it up with the marks you made on the centre line and gently poke and twist the tool until it comes out the other side. Repeat this for each of your signatures and that you will need to make sure your signatures and journal cover are all facing the right way up. Now to sew the signatures in , I like to start with the bottom one first ( in the video I started with the top) line up your signature with the spine of your book with your needle threaded (I used waxed thread) start pushing your needle through the middle hole until it is right the way through your journal cover. Make sure to leave a tail inside your journal, push the needle through the bottom hole and bring it back to the inside of your journal and then take it to the top hole and push it all the way through to the back of your journal. Then push the needle though the middle hole again trying not to split your thread that is already in place ( I put the thread taught before I do this as it makes it easier to see where to push it through this works most times) repeat this on all the signatures, now you have finished the sewing in or your signatures your will tie off your thread inside the journal with a square knot left over right then right over left. You now have a journal (what are you going to use yours for??)
Decorating of our journals using the elegance ephemera set 1 CO728831 and a piece of cardstock (colour of your choice)
Cardstock measuring 14 ½ cm x 5 ½ cm and a piece of the ephemera of your choice, glue the ephemera to the card stock with some all-purpose art glue.
Glue 3 side of your cardstock to the inside cover of your journal to create a pocket, I used the Couture creations Quick Dry adhesive CO726325 for this, as the pocket as it is a stronger glue
Decoration for the back cover
Using the card packaging from your Elegance ephemera set 1 CO728831(Couture creations 12×12 score board CO726342)
Score the long side at 1cm or ½ in on both side once you have done that cut off the scored intersections on the bottom flap and trim it just a little more so that it will fold up. Using Couture creations Quick Dry adhesive CO726325 place glue down the folded sides and the bottom flap of your piece and adhere to your back page. You may have to hold this in place for a few mins till it starts to dry finally cut the layered Elegance “Time to celebrate” layered sentiment cutting die set CO728840 with two contrasting cardstock colours eg pink and a green glue them on top of each other and attach them on the inside front cover in a position.
To finish of our closure grab your piece of 10 cm elastic, you will need to sew this on to your closure band either hand sew or use a machine. I don’t mind that mine was loose as this will allow for my journal to grow as we put more things into it or I may even turn it the other way and have it horizontal .
Also view my third video here: https://youtu.be/LkDr092hmKo
Thank you all very much for this very long blog today. I hope you have all enjoyed this project, Have a fabulous day
Fiona xx
Couture Creations supplies
CO728820 Elegance collection kit
CO728831 Elegance ephemera set 1
Co-ordinating cardstock
CO728840 Elegance – Time to celebrate layered sentiment cutting die set
CO726325 Couture creations Quick Dry adhesive
CO728511 Couture creations all-purpose art glue
CO727159 Couture creations Prik – tool Piercing tool
CO726357 Couture creations Bone folder
CO726342 Couture creations 12×12 score board

FIND OUT MORE ABOUT THIS PROJECT & JOIN US ONLINE
LOOKING FOR A PRODUCT?
Follow this link to find a retailer:
https://couturecreations.com.au/pages/store-locator
HAVE A QUESTION?
Email us here: [email protected]
WANT TO CHECK OUT WHAT'S NEW?
Follow this link to see the newest products coming to a stockist near you...
https://couturecreations.com.au/collections/newest-products
And follow us online to interact with other craft enthusiasts
and be inspired with regular content >>>
YOUTUBE | FACEBOOK | INSTAGRAM