Hello, hello it’s Fiona here again on the Couture Blog today. I had a lot of fun making these slim cards which are great for any number of things, some ideas that I came up with were to use in journals and a pull out piece to write or draw in and a card that you could slip or gift card into the pockets. You could create the tuck spot inside instead of the pocket, but I’m sure you talented people will come up with many more ideas. Have a great day and enjoy my Tutorial over on my You tube HERE: : https://youtu.be/CozdOWK2_WA
Instructions:
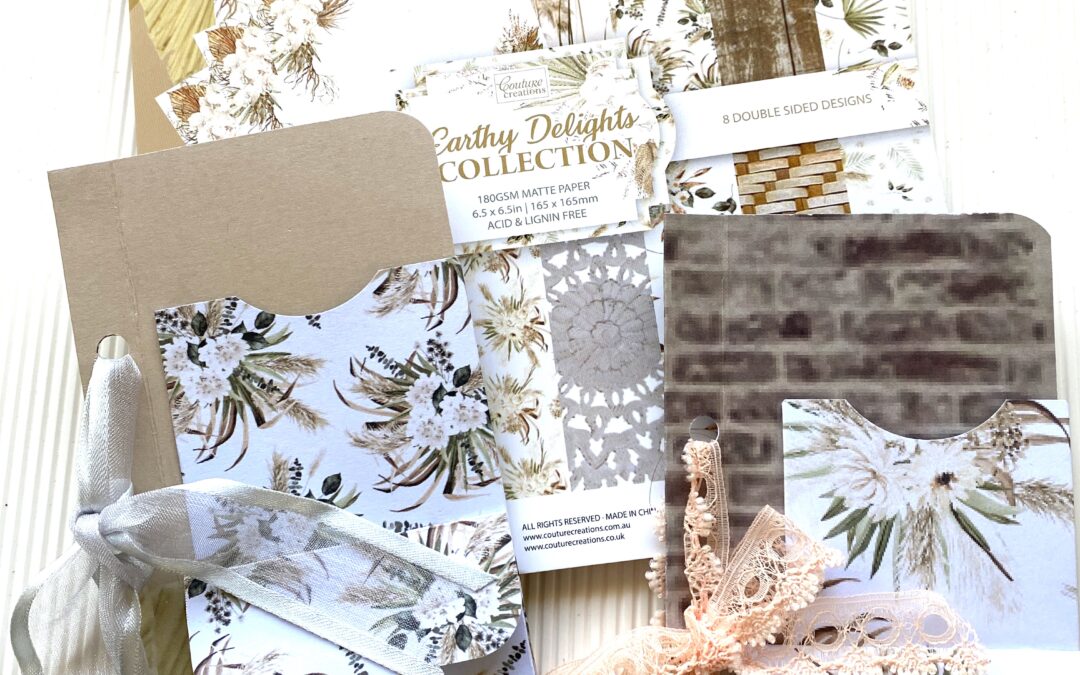
Select 2 pieces of 6 x 6 inch papers for this project.
Base
Using the base card fold in half or score at 3” and fold place the folded paper into your scoreboard, short edge up, then score along the closed edge of the folded paper at ½ inch to create the spine, Glue the ½ “piece together put aside to dry.
Pockets and tuck.
Cut the other piece of 6″ x 6” paper in half, you will need to decide what side you want as your front.
Place the front side down on the scoreboard, with the short side at the top and score at ¼” turn the paper so the other short side is at the top and score 3/8″ , turn the paper so that you have the long side at the top and score at 1 1/4″, before you make that score make sure that you 3/8th score is going to fold around the card (please see video for this.)
At the 1 1/4” score line cut out the little rectangle and mitre it also snip a small mitre at the top on the score lines, fold over the flaps and burnish them down on the 3/8th” fold line. Add some glue to the inside of the fold, line it up and wrap it around the open side of the base, you should have a small flap at the bottom ten add some glue to create a pocket/tuck. (You can choose which you would prefer on your ¼ “ fold) the add glue to the outside edge and fold it under to create a gusseted long pocket on the flap. Add some glue to one side or 2 sides, depending if you want a pocket or a tuck spot glue into place.
Envelope pocket.
With the 3 inch x 6 inch piece of card, we are going to put it in the scoreboard short side up and score ¼ inch then flip it around till the other short side it at the top. Score again at ¼ inch, turn the paper , so that the long side is at the top and score at 2 1/4 inches and 5 inches, with the 2 1/4 inch closest to you cut the triangles out up to the 5’inch score line, mitre them, flip it around so that the other end is facing you. Mitre the corner with a 1.5” punch and cut a notch into the envelope , fold over the ¼” score lines, add glue andseal up your edges.
Adhere some Velcro to create a closure for the envelope, add glue to the 3 sides of the envelope and square it up to the corner of the other pocket. Our project it just about completed, grab a small hole punch and punch 2 holes on the ½ inch base, so you can thread some ribbon through or you could add rings if you wanted to add a few of this slim pockets together.
Hope you like my project for today ,until next time Cheers Fiona Xxx


Couture Creations Material List:
- CO728878 Earthy Delights 6.5 x 6.5 inch pad
- CO728877 Earthly delights collection 12 x 12
- CO726343 Guillotine/paper trimmer
- CO726342 Scoreboard
- CO728523 Scissors
- CO728513 All-purpose art glue
Other: Velcro dots / Ribbon

FIND OUT MORE ABOUT THIS PROJECT & JOIN US ONLINE
LOOKING FOR A PRODUCT?
Follow this link to find a retailer:
https://couturecreations.com.au/pages/store-locator
HAVE A QUESTION?
Email us here: [email protected]
WANT TO CHECK OUT WHAT'S NEW?
Follow this link to see the newest products coming to a stockist near you...
https://couturecreations.com.au/collections/newest-products
And follow us online to interact with other craft enthusiasts
and be inspired with regular content >>>
YOUTUBE | FACEBOOK | INSTAGRAM