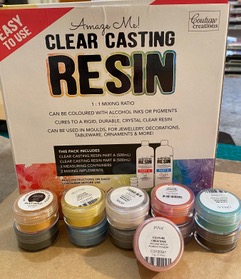
Hello, Fiona here today with my special resin project. I have created a video in two parts, Today is part 1 – this shows you how I created these Resin Journal covers with Couture Creations Clear Casting resin, please note; If you are working indoor make sure you have adequate ventilation and wear appropriate PPE eg. mask, protective glasses, and gloves when using resin. Make sure you prepare your area before you start to mix up resin and you will only have a certain amount of time before the resin starts to set once it reached that point you will have to throughout your resin and start again.
I used an old cardboard box and covered it with some baking paper. Make sure that the surface you are going to leave your project on is level as resin is self-leveling and if on it sets on an uneven surface it won’t be able to level properly. Prepare all the things you will use for the resin itself so pigment colour gold flakes flowers etc.
Once you have done all your prep work you are ready to start to mixing up your resin. Follow the direction on the box.
Using one of your 3 containers (included in the box) place 15mls of part A, in another container pour 15mls of part B, pour both of these containers into your remaining container starting with part B then A mix the resin together for approximately 3-5 min or until you see they are very well combined (I mix until I can no longer see any of the stringy bits in my cup and the resin is clear).
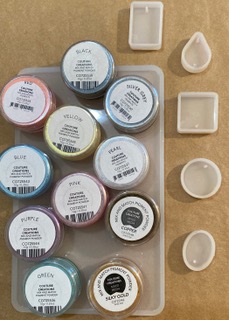
Stir for an additional 2 mins if you are going to be adding pigment to your resin, then set aside the amount of premixed resin you will require and add your pigment (I used Couture Ceations Pink pigment in 15mls of the resin) till you get a nice even colour now you are ready to pour your resin into the mould of your choice for each project you will use a different amount of resin.
For this project I used 60mls of resin in total and the little bit that was left over I put into a pendant mould after adding some couture creations blue pigment. I Started by pouring my (pink) resin in first then I added my mini dried flowers using my tweezers to place them where I needed them to be then added the remaining resin, which was clear to my project till the mould was full but not over flowing. Waiting approximately 10 mins then I sprayed the resin mould with some Couture Creations Isopropyl Alcohol to get rid of any small bubbles that may be in the resin. I also moved the flowers around a bit more to suit what I wanted and to make sure each flower was covered in resin.
If I was to do this project again, I would definitely use pressed flowers and not just dried flowers as this is a very shallow mould but in part 2 I will show you have to fix this problem.
Thanks for stopping by : Until next time Fiona (Elliomoon Art)
Facebook @elliomoon.art. Facebook @Fiona Elliott
Instagram @Fiona0066 Instagram @elliomoonarts


FIND OUT MORE ABOUT THIS PROJECT & JOIN US ONLINE
LOOKING FOR A PRODUCT?
Follow this link to find a retailer:
https://couturecreations.com.au/pages/store-locator
HAVE A QUESTION?
Email us here: [email protected]
WANT TO CHECK OUT WHAT'S NEW?
Follow this link to see the newest products coming to a stockist near you...
https://couturecreations.com.au/collections/newest-products
And follow us online to interact with other craft enthusiasts
and be inspired with regular content >>>
YOUTUBE | FACEBOOK | INSTAGRAM