Fiona Elliott here with my treasure Arty Ephmera box created and and decorated with Couture Creations products, I have created a video and step by step instructions for you all
Enjoy!!
You will need
- 1. Shoe box
- 2. Craft knife/ scissors
- 3. Glue COUTURE CREATIONS clear Tacky glue / COUTURE CREATIONS all purpose art glue
- 4. Gel medium
- 5. Paint brush/pallet knife
- 6. Paints
- 7. Anything you would like to decorate your ephemera box with
- 8. Paper to cover your box with these can be just old book pages or whatever you have in your stash.
- 9. Stencils if you would like to put some stencilling on your box
- 10. Modeling paste
- 11. Card for making tabs/ or a bit of cardboard I used some from packaging
- 12. Bulldog clips
INSTRUCTIONS
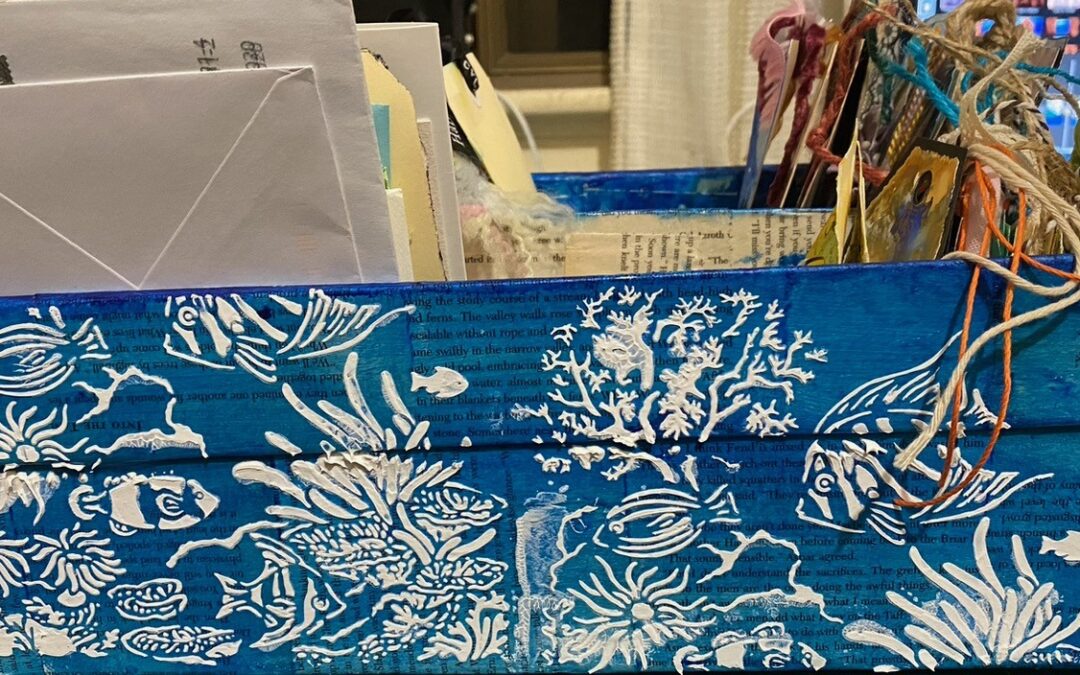
1. Cut the top of your shoe box leaving just to lip of the box we will glue the lip of the box to the actual box this will help to make the box stronger I used couture creations clear tacky glue as this will allow me to move the lip until I have it in the right place 2. Positions the lip around the box and glue it down I used bulldog clips to hold it in place while it dried 3. Next, I used the rest of the box to create the sections on the box 10cmx29.5cm piece of the box for the centre section and I used 3.5 x3.5 cm section for the dividers in the box. You could make as many dividers as you require for your box. 4. Create some tabs to go onto your dividers I use a 2cmx1cm tab and attached them to the dividers and then glued them to the box with some couture creations all purpose glue 5. I waited for a while to let some of the glue dry, I then used old book pages to cover my box inside and out, using gel medium to give it strength and durability. To do the corners of the box both inside and out I used square bits of paper and folded them into 4 I ripped along on of the 4 squares and folded the ripped edge to the one beside it creating a right angle to place in the corners of my box when I did this for the outer edges I placed the square over the corner of the box so that it faced inward so I had a square towards the inside I split this inside square up the centre on the diagonal and glued the edges down on the inside of the box this help to make the corners strong and gives it a nice finish allow your box to dry properly I left mine for at least 4hrs.
Thanks for joining here with me today ,until next time Fiona XX


FIND OUT MORE ABOUT THIS PROJECT & JOIN US ONLINE
LOOKING FOR A PRODUCT?
Follow this link to find a retailer:
https://couturecreations.com.au/pages/store-locator
HAVE A QUESTION?
Email us here: [email protected]
WANT TO CHECK OUT WHAT'S NEW?
Follow this link to see the newest products coming to a stockist near you...
https://couturecreations.com.au/collections/newest-products
And follow us online to interact with other craft enthusiasts
and be inspired with regular content >>>
YOUTUBE | FACEBOOK | INSTAGRAM